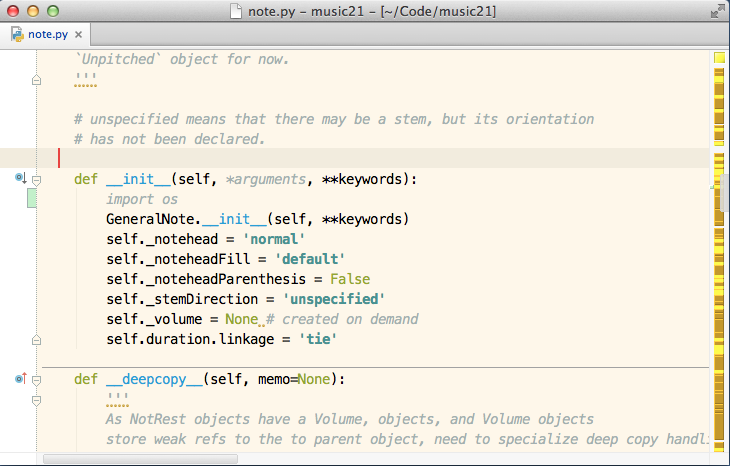
The whole Editors versus IDEs debate is getting old and boring, especially because it is not a zero sum game. I’ve been using Emacs for 15+ years and at one point I used it to read my email, browse the web, and make coffee (haven’t we all?). But today I find that I’m more productive by using the right tool for the right job.
Powerful editors like Emacs and Vim are fantastic. I find it puzzling that some editors or IDEs perform basic operations such as search and replace clunkily while Vim and Emacs get it just right.
And yet a search for terms like “Vim as a Python IDE” or “Emacs as a Python IDE” returns hundreds of thousands of links, which shows that people want features such as smart completion, code navigation, and project support. To give you one data point, one of my most popular posts is “how to configure Emacs as a Python IDE”, even if it’s six years old and out-of-date.
PyCharm is one of the most popular IDEs for Python and it’s packed with great features. In this post I will show how to get started with PyCharm quickly to have a productive Python development environment. I’m using PyCharm 3.0.2 Professional Edition on the Mac (they have an open-source version as well). I use a heavily modified default keymap (it also has Emacs and Vim keymaps). I suggest you check the official Mac and the Windows/Linux reference cards for the default shortcuts.
Initial Customization
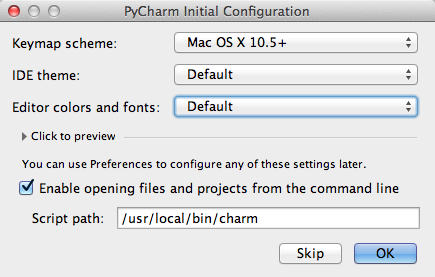
When you start PyCharm for the first time it asks what keymap and theme you want to use. I don’t like its Emacs keymap, so I use the default Mac OS X keymap and customize the shortcuts I want:
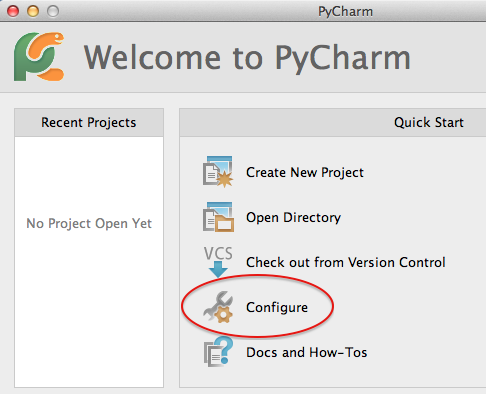
If this is the first time you are using PyCharm and don’t have a configuration to import you may want to click on “Configure” in the welcome screen to set some basic things:
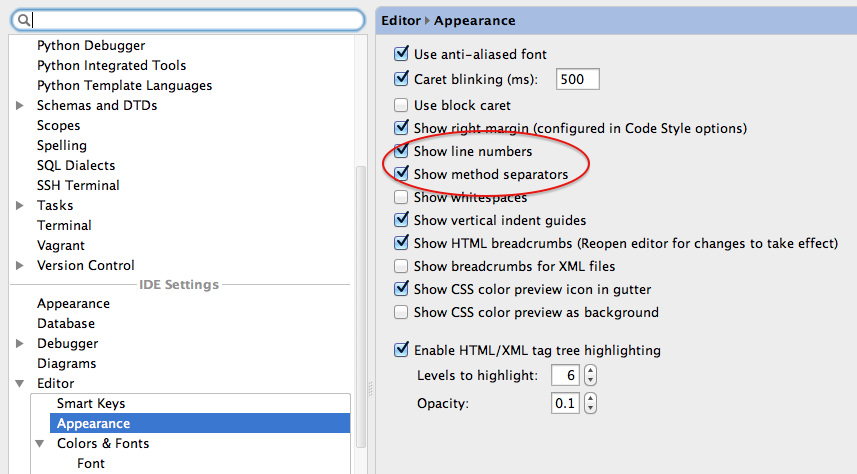
I like to show the line numbers and method separators (Editor→Appearance→Show method separators, Show line numbers):
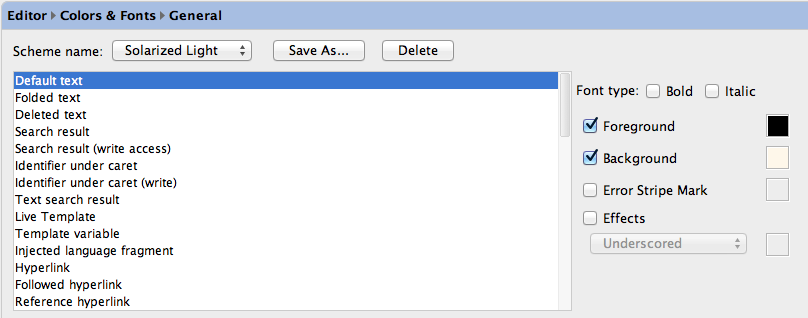
Also, I like the Solarized theme. I install it by following the instructions and select it as the default theme in Editor→Colors & Fonts. Solarized light for IntelliJ has some weird colors choices (for instance, it uses gray for the default text instead of a crisper black), so I change it on Editor→Colors & Fonts→General. My advice is not to be afraid to change the colors to something you like. You can export your settings in case you need to re-install PyCharm.
Compared to some IDEs, I find PyCharm visually clean, and if you want an even cleaner UI, you can hide the toolbar, the tool buttons, the navigation bar, and the status bar (on the View menu):
The Python Interpreter
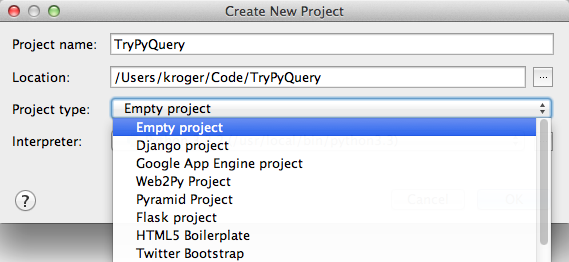
You can create new projects with File→New Project or open an existing project with File→Open Directory. PyCharm supports many types of Python projects such as Django or Flask out-of-the-box. For this post I’ll create a simple project to test the pyquery library (I’ll choose the “Empty project”).
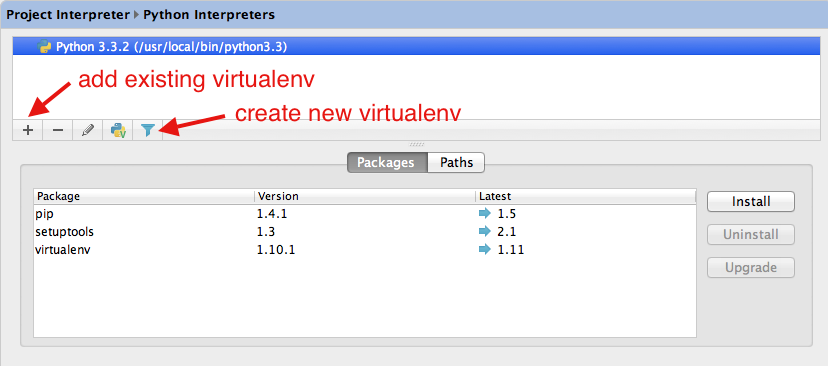
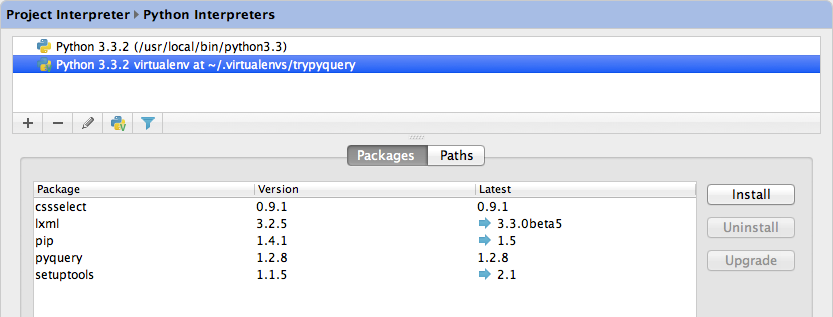
You need to tell PyCharm what Python interpreter you want to use since it can use a different interpreter for each project. It will use this information to index all available libraries. A good practice is to have one virtualenv for each project. You can either use an existing virtualenv or create a new one from PyCharm (Settings→Project Interpreter→Python Interpreters).
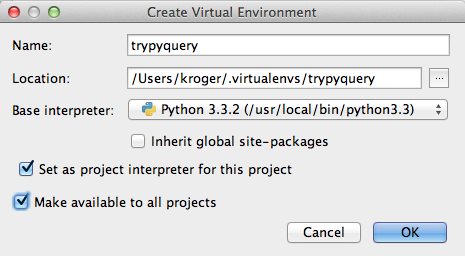
For this project I’ll create a new virtualenv and make it available to all projects:
You can quickly search, read the description, and install packages from PyCharm. This is nothing you couldn’t do on the terminal, but it’s very convenient to be able to search for packages without leaving your IDE.
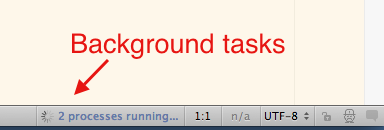
Some packages may take a while to install, especially if they need to be compiled. PyCharm runs the installation in background and you can see what is happening by clicking on the status bar:
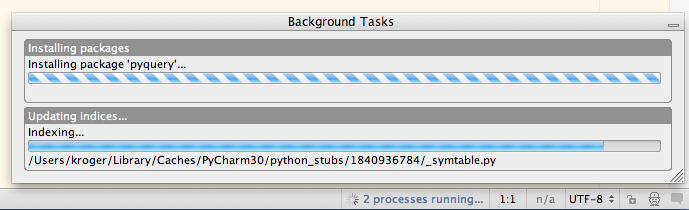
As we can see, it installed not only pyquery, but its dependencies as well, such as
lxml (as we would expect):
Shortcuts
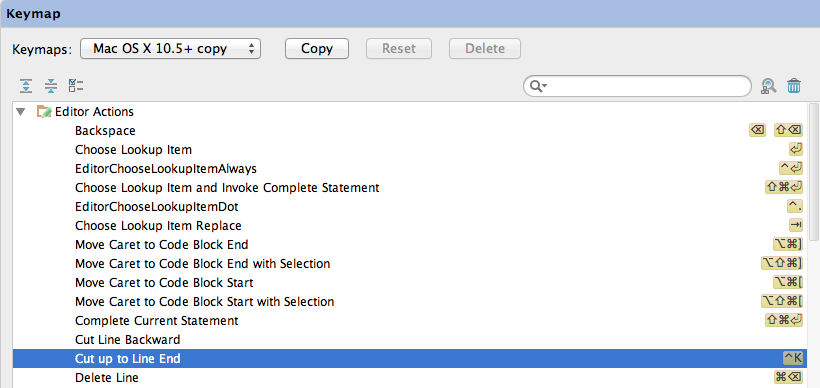
PyCharm is no Vim, but you can do a lot by using only the keyboard. You can assign shortcuts to dozens (if not hundreds) of actions in Settings→Keymap. I change the default keymap pretty heavily since I like to have shortcuts like Control-a, Control-e, Control-k, and Control-y that are default in any Cocoa text box but are not setup by default in the “Mac OS X” keymap. You can also define mouse shortcuts. For instance, I changed Quick Documentation to use Option-Click. If you are a Vim user you may want tot try IdeaVim, a Vim emulator plugin. I heard good things about it, but I didn’t have the chance to try it yet.
I use the Dvorak keyboard layout, and annoyingly, there’s a bug where the wrong keys are used. People have reported this problem with French Canadian and German layouts as well. This means that I have to rebind quite a few shortcuts just to avoid this problem.
PyCharm uses function keys such as F1 and F2 a lot. As you probably know, on the Mac the top keys work as “multimedia” keys by default and as function keys by pressing the Fn key. We can swap this behavior in System Preferences→Keyboard.
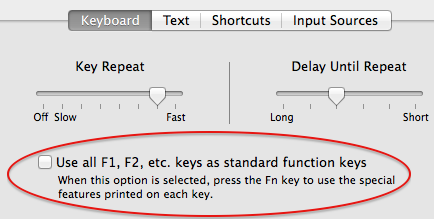
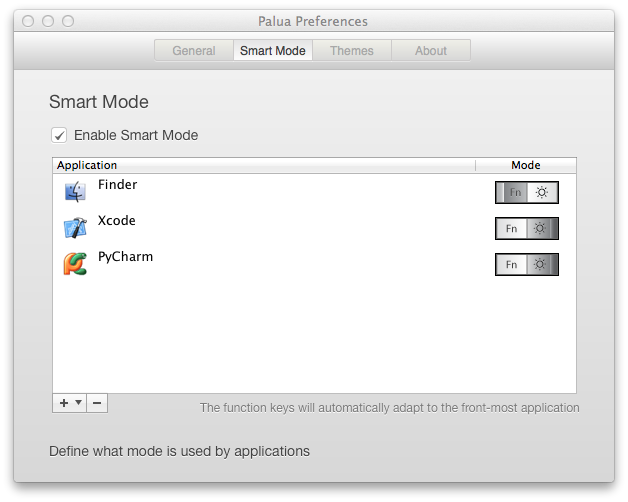
I like to be able control the sound volume and change the brightness without having to reach for the Fn key, but I also like to use the function keys while programming without reaching for the Fn key (I’m lazy, what can I say?). I use Palua to switch between the “multimedia” and function keys. You can switch with a global key or you can configure Palua to switch automatically when using a specific application. I use the multimedia keys for all applications (the default) and configure Palua to use the Function keys for Xcode and PyCharm.
External Editor
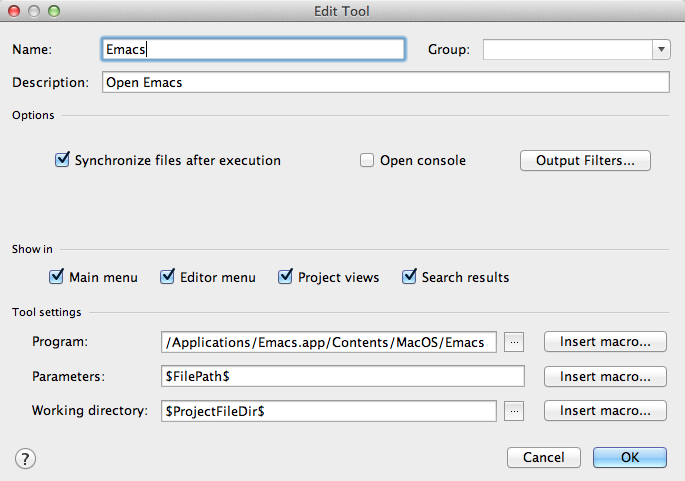
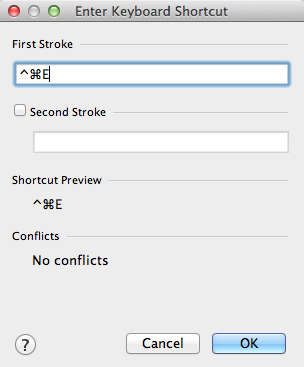
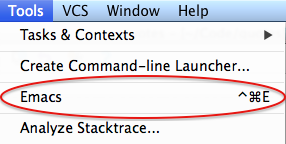
PyCharm can launch any external tool, so I configure it to open Emacs with the current file. This is useful when you want to do some quick editing that is faster with your favorite editor (Emacs, Vim, TextMate, etc).
Go to Settings→External Tools, make sure “Open console” is unchecked and insert the path
to the Program, the Parameters (in this case we can get the full file name with
$FilePath$) and the Working directory ($ProjectFileDir$/$FileRelativeDir$/).
You can assign it to a shortcut:
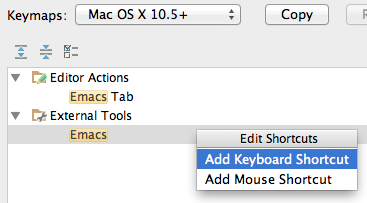
And now it’s available from the menu as well.
Running Code and the REPL
There are many ways to run our code with PyCharm. We can use the venerable print function (or statement, depending on your Python version), import code on the REPL, send code to the console, use the debugger, or use IPython on a terminal.
The Venerable Print
Using print to display values is a useful and widely used technique, but it can lead to
messy code if not used carefully.
We can run the code by clicking on the “play” button or with Control-R if the file is already selected to run.

If the file is not selected to run, with can select and run it with Control-Option-R or by right clicking and selecting from the context menu. PyCharm will remember your choice and you can use Control-R the next time. It sounds complicated but it is really simple. Check the manual for more information.
Console and REPL
My favorite way is to run the code on the REPL. You can open a Python console inside PyCharm on Tools→Run Python Console (I’ve assigned it to Control-C Control-C). It’ll use IPython if available (I recommend you install IPython inside the virtualenv) and will add the path of the current file to Python’s path. On the console you can import the functions you want to execute as usual.
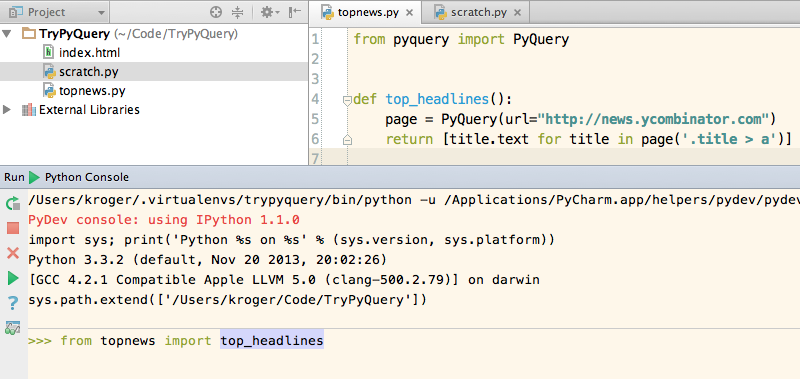
Completion is available in the console as well:
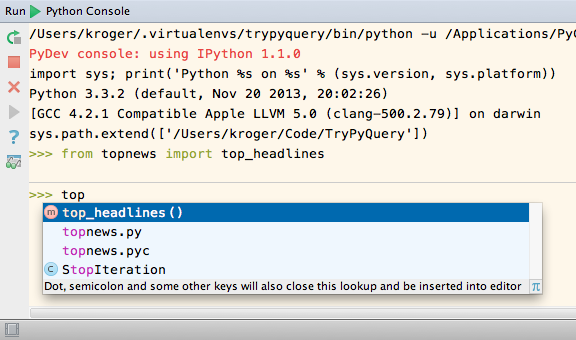
Having imported the function, we can run it as usual. And we can toggle the console visibility easily with ⌘–4.
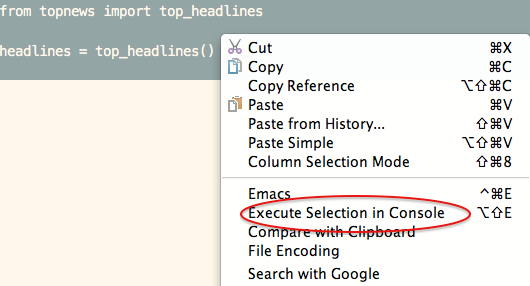
Execute Selection in Console
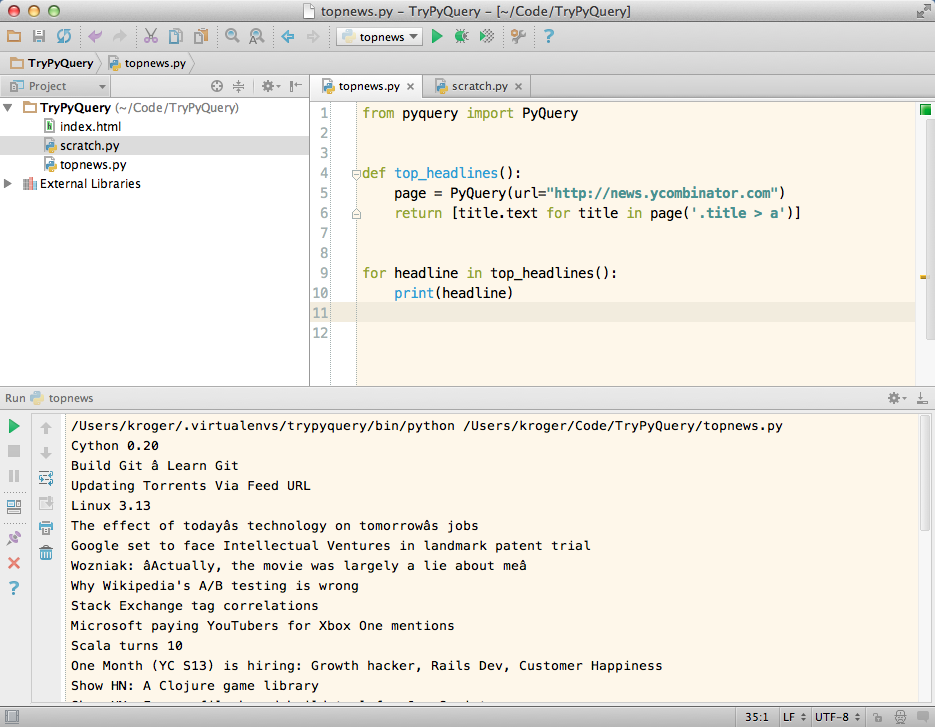
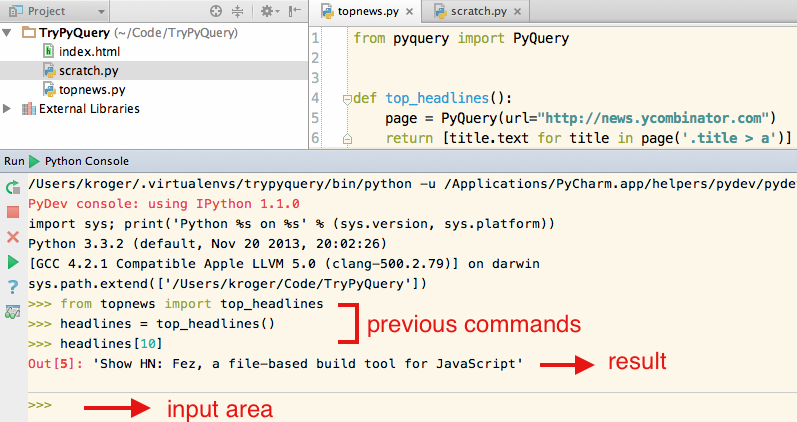
If the code I want to run is more than a couple of one-liners and not formal enough to write unit tests (I may be playing with data, for instance) I may save it in a scratch file. We can select the code we want to run (usually I just select the whole file with ⌘-A) and pick “Execute Selection in Console” from the context menu (or, even better, use the keyboard shortcut). [I omitted some menu items in the screenshot to make it shorter].
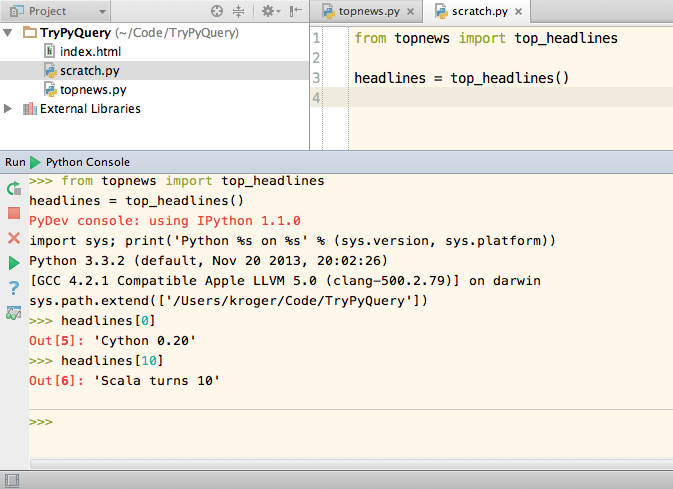
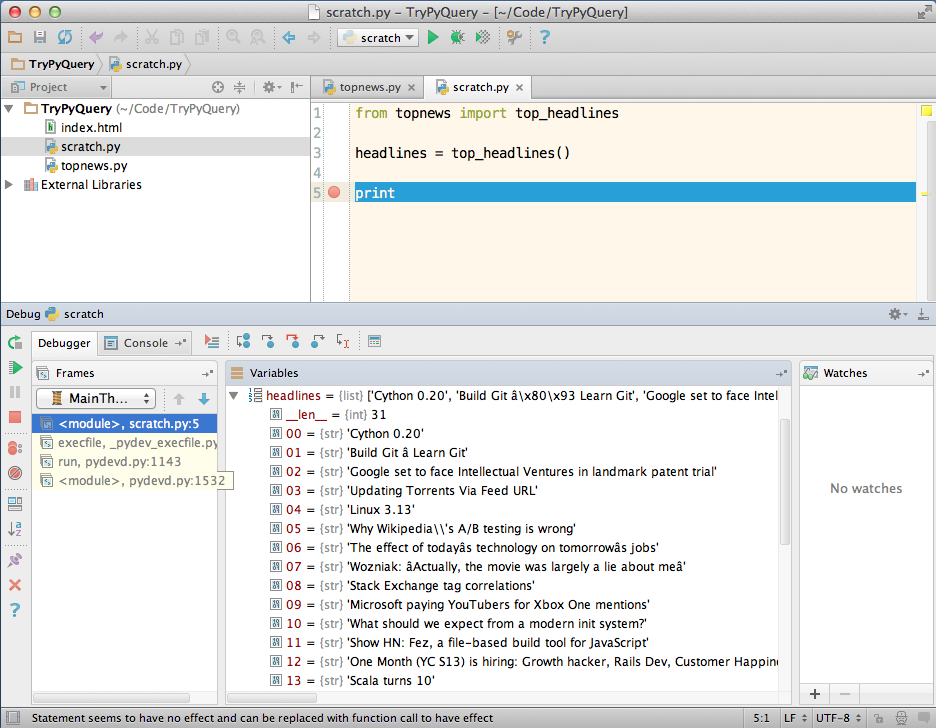
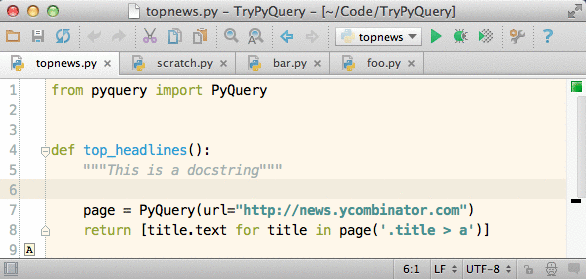
In the following example the headlines variable is available in the console since we
have selected the whole scratch file to be executed in the console:
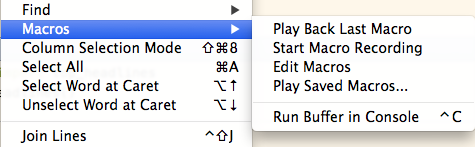
Macros
It would be nice if we could send the whole file to the console in one operation. Fortunately, we can record a macro. Select Edit→Macros→Start Macro Recording and perform the operations as before (select the whole file, send the selection to console, switch to the console). As you can see, my macro has only four actions (I press the down arrow key to remove the selection):
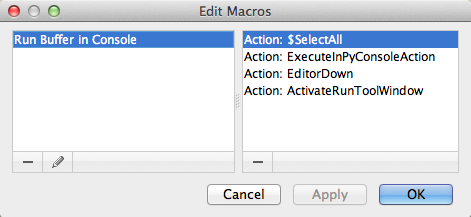
After you record the macro it’s available in the Macros menu and you can assign a shortcut to it (I use Control-C Control-E, but for some reason PyCharm only shows the first half of shortcuts with two strokes).
Debugger
Many people like to use the debugger to inspect data. Even if I prefer to use the REPL,
sometimes the debugger is just more efficient, especially when inspecting complex
objects. PyCharm doesn’t allow you to set a breakpoint on an empty line, so in this short
example I had to add an extra line (I used print, but I could have used pass) since I
wanted the debug to stop after setting the headlines variable. In real-life code this
is seldom necessary.
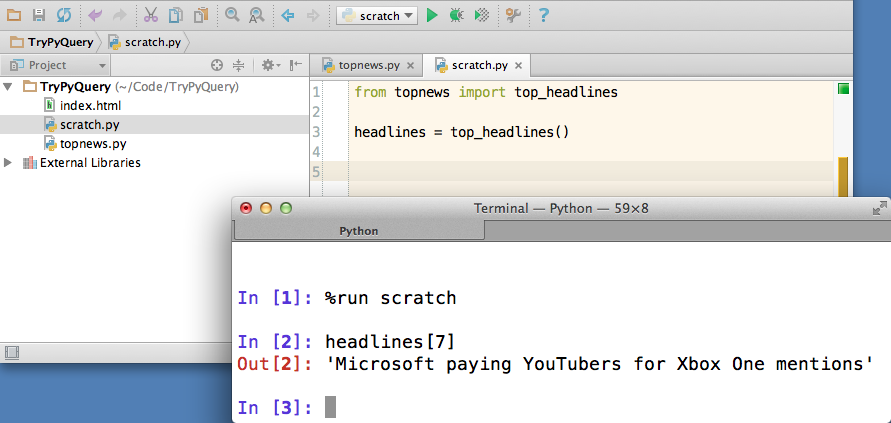
Vanilla IPython
Finally, there’s nothing wrong with running an external terminal with IPython and using
features such as %run and autoreload.
Finding Commands
It’s easy to get overwhelmed with so many commands. If you use PyCharm on the Mac you can use Help→Search as usual, or you can use Help→Find Action in any platform. It allows you to search for any PyCharm command, including the ones not available from the menu. (Emacs addicts will note this is somewhat similar to Emacs’ M-x). This is very useful and powerful and I use it all the time.
Code Completion
Completion in PyCharm is top notch. By default PyCharm will suggest things while you are typing:
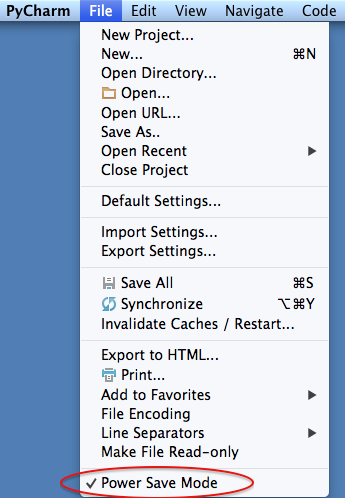
Since this feature can be a little power hungry, you can disable it by selecting File→Power Save Mode. You can still use completion by calling it explicitly with Control-Space.
When completing, you can narrow the suggestion list by typing a substring:
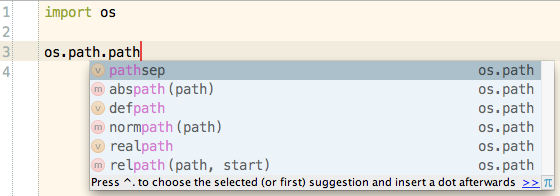
Or you can type only the first letters of CammelCaseClasses or function_names_with_underscores:

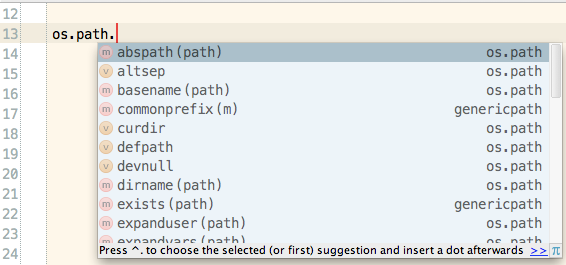
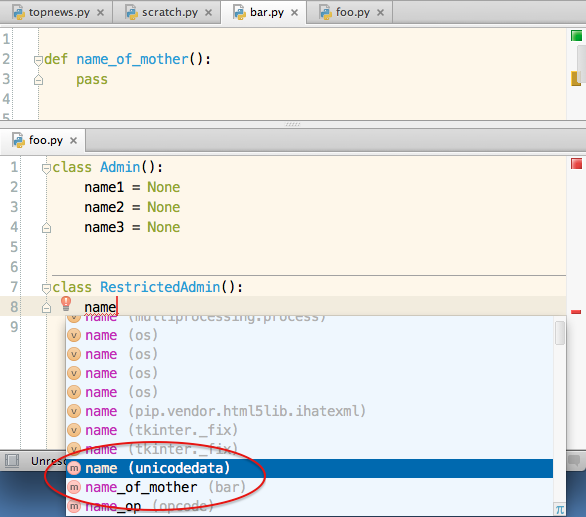
If you type Control-Space once PyCharm will try to list the most related items:
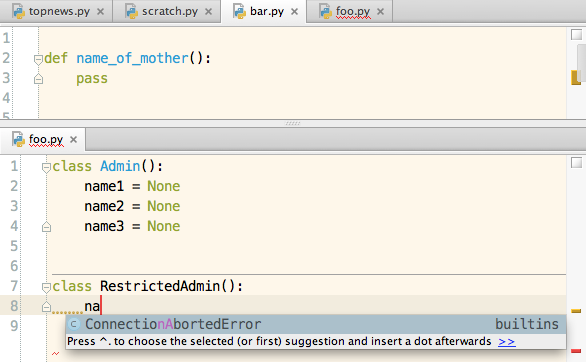
If you type Control-Space again it will list every name it knows. This can be
overwhelming, but notice it is listing the function name_of_mother from the unimported
bar.py file.
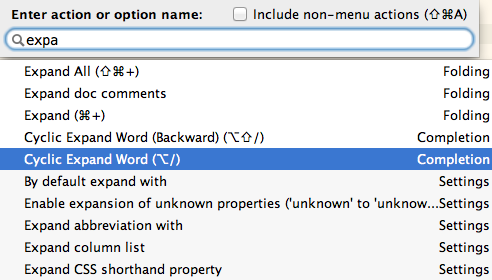
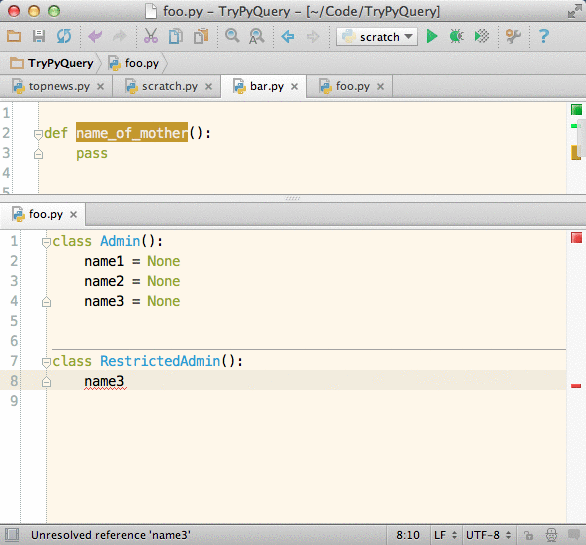
But often you just want to complete the name of a local variable in one of the opened buffers. This feature has been available in Emacs and Vim for ages and now it’s available in PyCharm as well. The manual calls it Hippie Completion, but the actual command name (that is, the name you will find in Find Action) is “Cyclic Expand Word” and in my tests it’s working even inside docstrings.
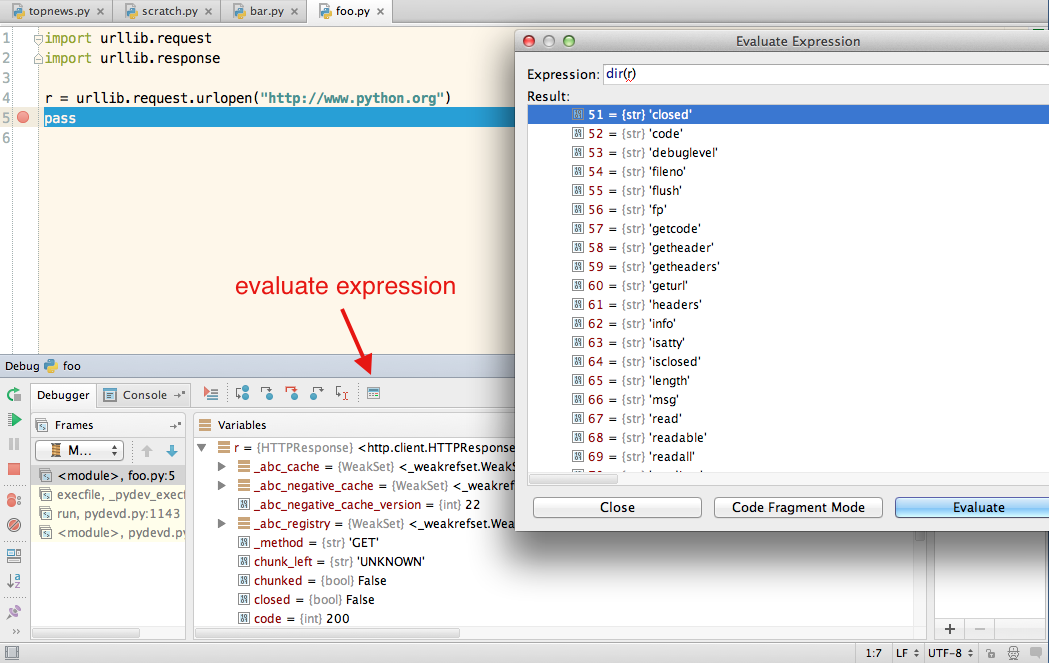
Completion may not work in some cases when a library doesn’t have type hints. This
StackOverflow page suggests to set a breakpoint in pdb and list the possible
attributes with dir. One similar solution is to create a breakpoint in PyCharm and
evaluate an expression at the breakpoint by clicking on the last icon in the debug
toolbar (or using the appropriate keyboard shortcut). In this case I evaluated the
expression “dir(r)”.
Access to Documentation
PyCharm has three ways to access documentation: Quick Definition, Quick Documentation, External Documentation, and Parameter Info. You can access them from the View menu or from the respective shortcuts.

Quick definition will show the whole definition (duh!) of a symbol (class, method, function, etc), including the documentation, of course. It’s useful when you just want to take a quick look at the definition without jumping to it.
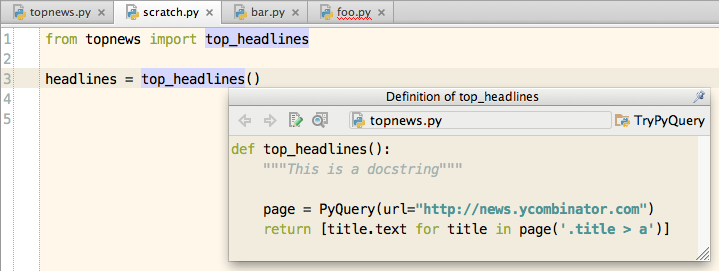
Quick documentation will show the symbol’s documentation and signature.

Finally, External Documentation, and Parameter Info are pretty straightforward. The first opens the documentation in the default browser and the second shows the parameter information for a function or method (useful to quick check the name of keyword arguments, for instance).
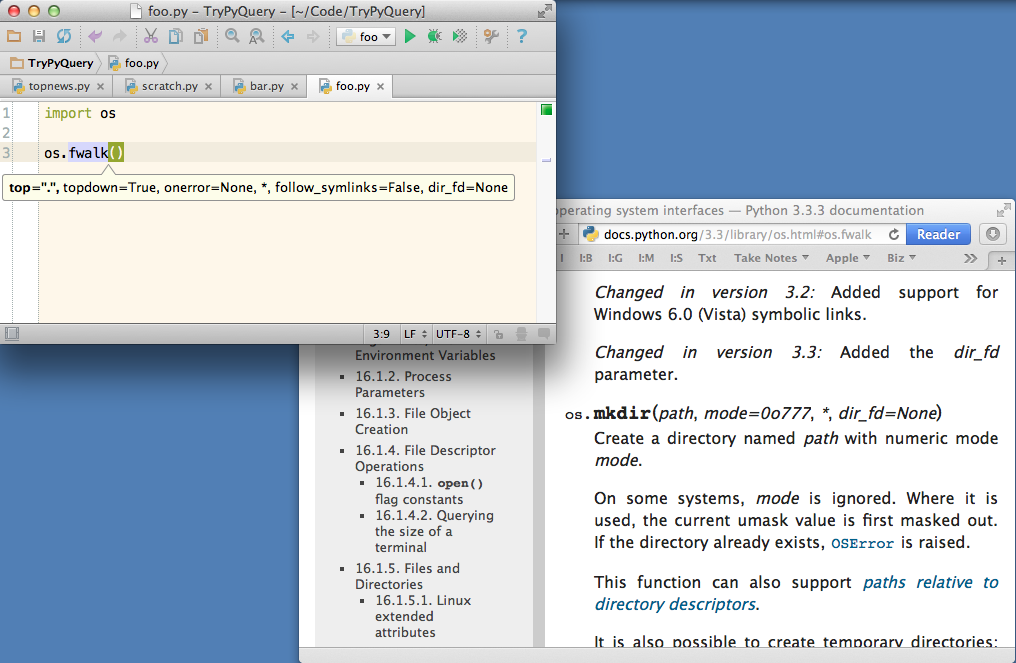
The external documentation works out-of-the-box with Python (of course), PyQt4, PySide, gtk, wx, numpy, scipy, and kivy and you can add the path for external documentation in Settings→Python External Documentation.
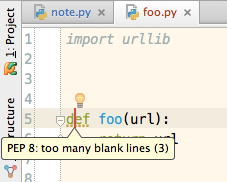
Code Quality
PyCharm checks if your code conforms to PEP8 while you are typing. It’ll let you know if you have too many spaces or blank lines, if you are using underscores instead of CamelCase for classes names, and so on. If you want, you can configure PyCharm to run pylint as an external tool, as well.
Navigation Commands
PyCharm’s power starts when you master its navigation commands. It can jump to classes, functions, and so on. You can jump to the definition of a class, method, function, or variable quickly with ⌘-B or ⌘-Click on a Mac or Ctrl-B or Control-Click on Windows and Linux.
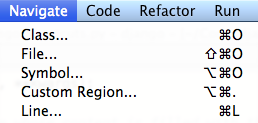
The mechanism to navigate to a class, file, or symbol is pretty much the same. You are presented with a dialog where you can type a substring, include items outside your project, and filter the results if necessary. Go to the Navigate menu or use the appropriate keyboard shortcut:
This is a typical dialog to navigate to a Class definition:
You can enter part of the name, including the file extension. For instance, if you want to open a JavaScript in a Django project but don’t remember its name, you can search for “.js”.

These features allow us to navigate the source code very quickly. Let’s suppose we are
studying the Django source code and we want to see how the function render is
implemented. We don’t know where it’s defined, so we go to Navigate→Symbol (⌥-⌘-O), type
“render” and pick the first option (we can see it’s defined in django.shortcuts). If we
have hidden the navigation bar we can show it quickly with Navigate→Jump to the
Navigation Bar (⌘-↑) and see where the file is located (django→django→shortcuts.py):
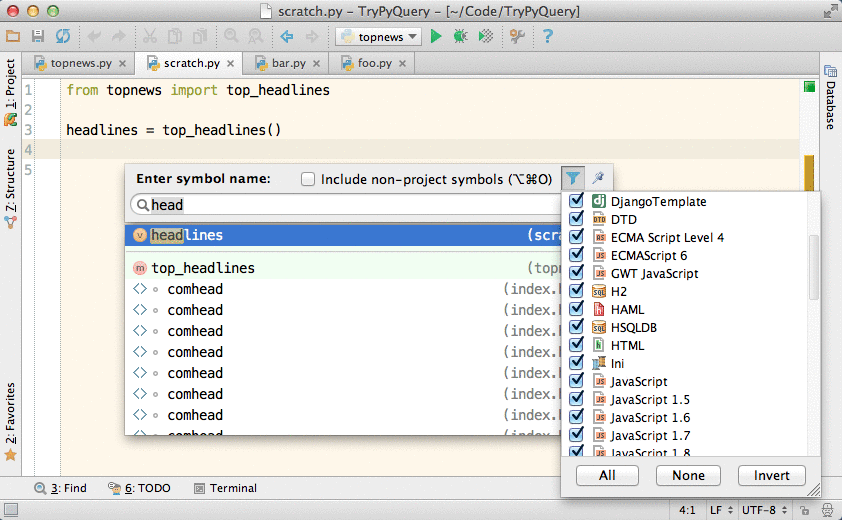
Sometimes it’s useful to filter the completion results to take out things you are not interested. In the following example I remove the results related to JavaScript to have a much cleaner completion list:
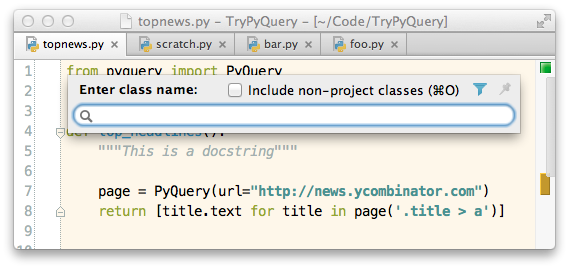
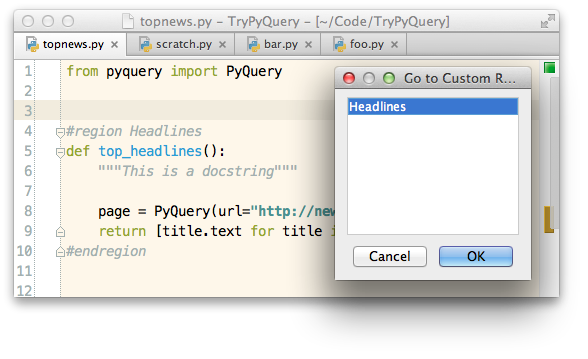
PyCharm allows you to fold blocks such as classes, methods, and functions, but you can create your own foldable regions. This is useful when it makes sense to group things (classes, methods, functions, etc) in one bigger block. These blocks can be folded allowing us to focus on particular regions of the code. You can list all regions in a file by going to Navigate→Custom Region or using the appropriate keyboard shortcut. Sadly there’s no way to list all regions in a project.
Unit tests
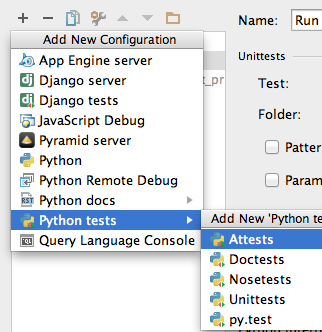
Before we can run a test we need to add a new Run/Debug configuration. We go to Run→Edit Configurations and click on the plus button on the top left corner. Then, we select “Python tests” and the test runner. For this example I’ll use Unittests:
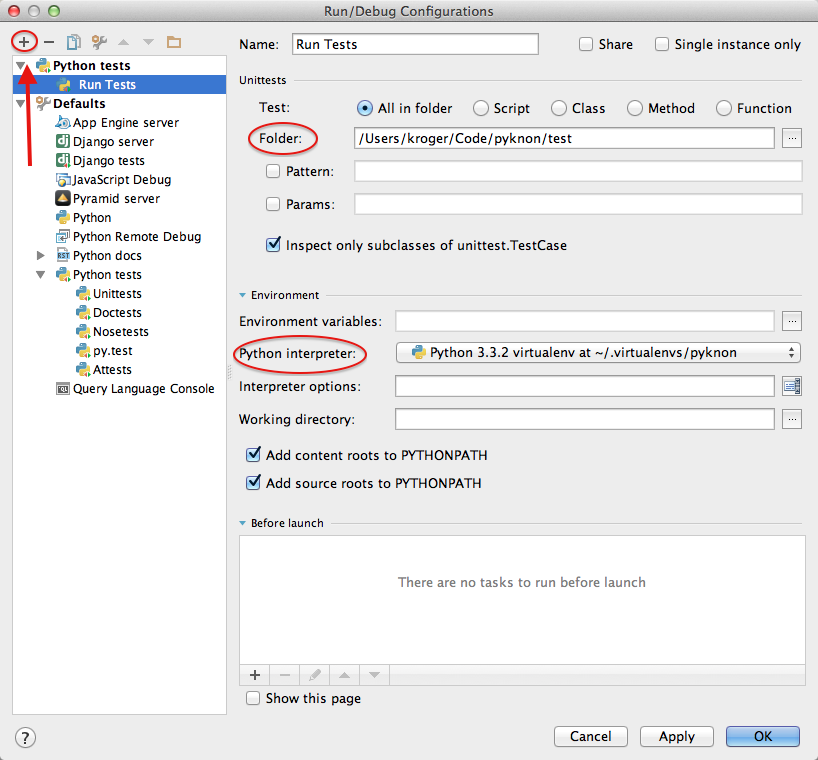
Finally, we need to add the folder where the tests are and pick the right Python interpreter:
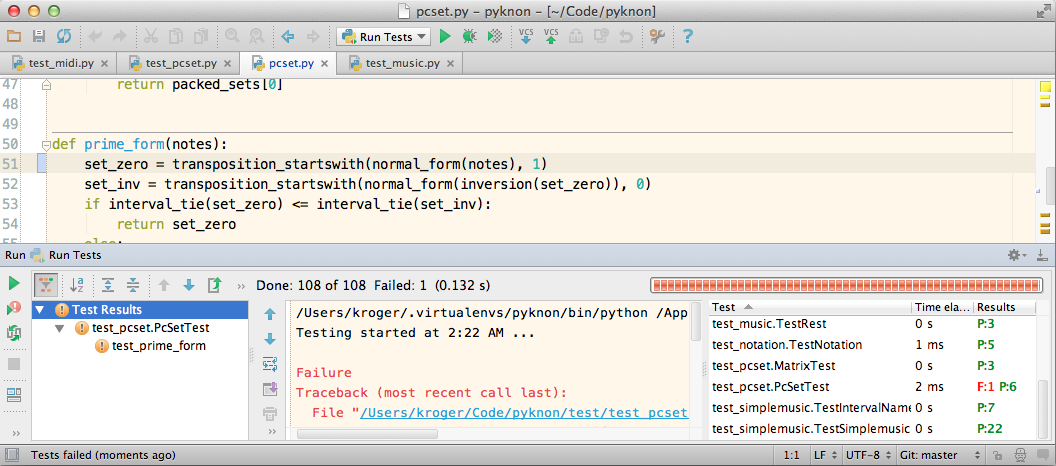
Now we can run our tests just like we run code: by clicking in the toolbar or by selecting Run→Run (Control-⌥-R). This will open a dialog where you can choose what you want to run (you may have other things to run). You can run all tests or only the test on the cursor.
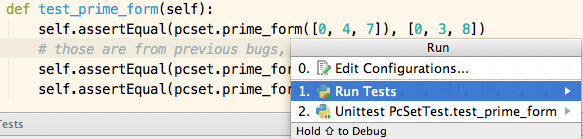
After you run the tests, PyCharm will remember your last choice, so you can repeat it with Control-R. This is useful if you are fixing one particular test case and want to run it multiple times without running the other tests. You don’t need to have the cursor on the test file you want to run; you can run the tests from any file. You can go from the code to its test by selecting Navigate→Test (or appropriate hotkeys).
Dealing with multiple files
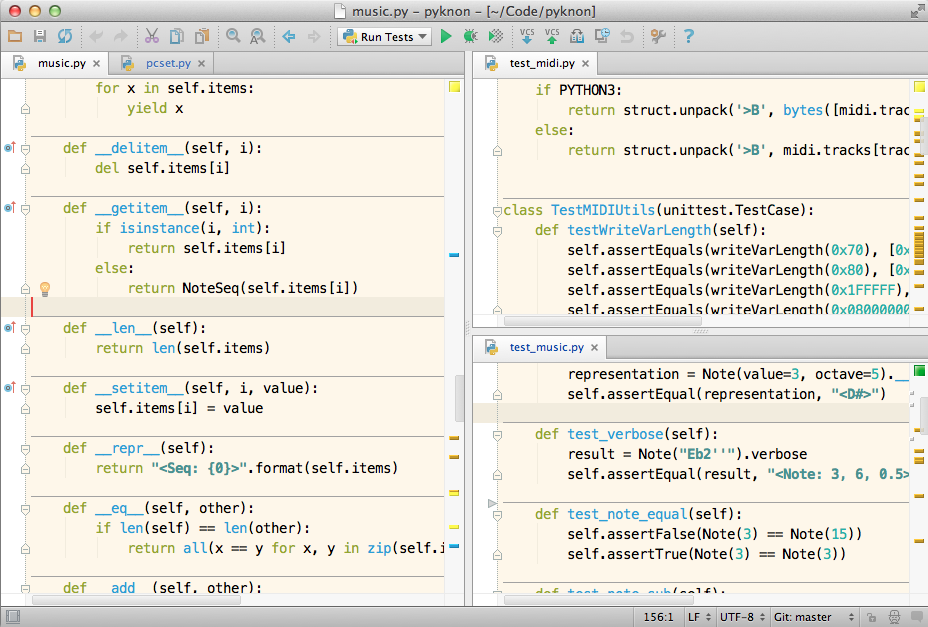
As you noticed, PyCharm uses one tab per file:

To switch to tabs we can use the commands Select Next Tab and Select Previous Tab. They are bound to Control-→ and Control-← by default, but OS X uses these keys, so I rebind them to Control-⌘-N and Control-⌘-P (I use the same shortcuts to switch tabs in the Terminal).
One more direct approach to go to a tab is to use Navigate→File as we’ve seen, or
View→Recent Files (⌘-E) and View→Recently Changed Files (⇧-⌘-E). These last two commands
will present a list of files where you can click on type a substring to narrow the
selection. In the following example I only had to type “⌘-E”, “s”, “enter” to go to the
tab with the scratch.py file:
Split Windows
PyCharm has support for split windows. It’s not as advanced as in Emacs and Vim but it’s useful enough.
No command to deal with split windows have shortcuts assigned to them by default, so you’ll have to do it yourself. These are the keys that I use:
- Split Vertically, Control-S
- Split Horizontally, Control-H
- Unsplit, Control-C Control-U
- Unsplit All, Control-C Control-A
- Goto Next Splitter, Control-C Control-N
- Goto Previous Splitter, Control-C Control-P
- Move to Opposite Group, Control-C Control-M
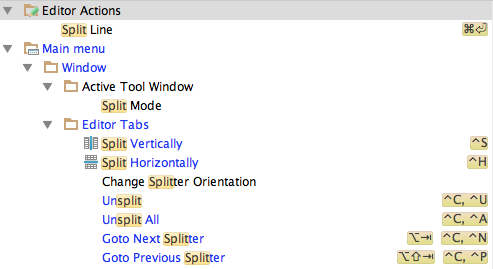
Move to Opposite Group will move a tab to another group, but it only works if we have only two panes. In this case it’s just easier to drag and drop the tab to the desired place.
Conclusion
PyCharm can do a lot for us out-of-the-box. We saw how to use virtualenv, define shortcuts, use an external editor, run code, define macros, find commands with Find Action, be productive with code completion, access documentation, navigate the source code, run unit tests, and deal with multiple files and split windows.
And we are just scratching the surface. We didn’t talk about editing, version control, plugins, debugging (local and remote), templates, using TextMate bundles, web development, and much more.
I suggest you check PyCharm’s official documentation, including the Quickstart Guide and the Online Help. Also, Andrew Brookins wrote a very good PyCharm review from a Vim’s user perspective. I recommend it even if you don’t use Vim.